Hello everyone! In the last post, we discussed the hardware I chose for my home Kubernetes cluster. Today I want to tell you why I chose k3s as my Kubernetes distribution and how I set it up.
Why k3s?
When choosing the right Kubernetes distribution for my home cluster, several factors were key. I needed something that was lightweight, easy to manage and yet powerful enough to support a multi-device cluster. k3s turned out to be the ideal choice as it offers all the core functionalities of Kubernetes in a single, compact binary.
The advantages of k3s
- Lightweight: k3s removes some of the less frequently needed features and plugins that are present in standard Kubernetes setups, making it ideal for scenarios with limited resources.
- All in one binary: The simplicity of installation and maintenance, as everything is contained in a single executable binary, makes setup and updates much easier.
- Flexible: Despite its compactness, k3s supports full Kubernetes functions and can easily manage clusters with multiple nodes.
Alternatives and their limitations
During my research, I also considered other distributions such as Minikube and MicroK8s. While Minikube is great for local development, it only supports a single machine, which makes it unsuitable for building a home cluster. MicroK8s is also a solid choice, especially on Ubuntu systems, but it is more tied to Ubuntu and was less flexible than k3s for my needs.
Architecture
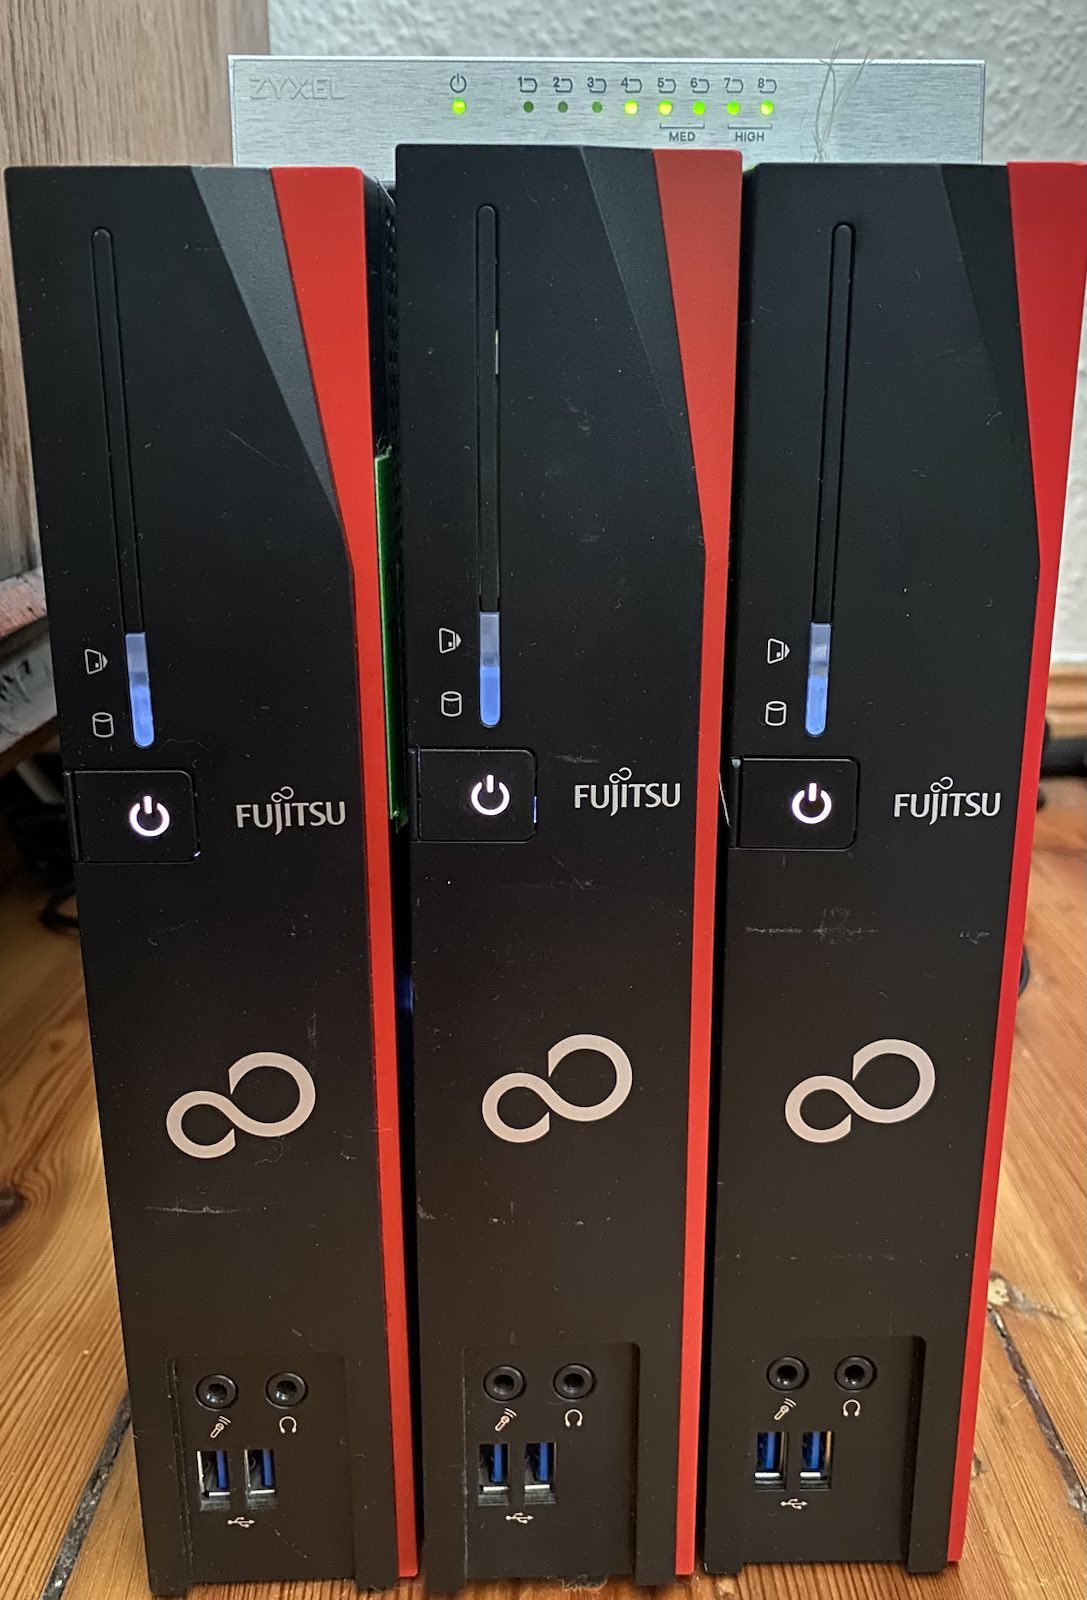
I have a total of 3 computers at my disposal. One computer is to act as the master server and control plane. The other two will be set up as worker nodes. In large Kubernetes environments, the master servers are also designed redundantly. This requires an odd number of computers so that the master servers can always determine a leader.

I will deactivate two integrated components when installing k3s:
- traefik – is supplied as Ingress. I would like to keep the configuration in my own hands and will install traefik in the cluster myself later on
- servicelb – instead of the integrated, simple load balancer, I would like to use metallb in order to be able to utilise the advantages of my installation consisting of several servers.
Automation of the k3s installation with Ansible
The choice fell on k3s because it is a lightweight but powerful Kubernetes distribution that is perfect for environments with limited resources. To automate the installation and configuration of k3s on my thin clients, I opted for Ansible, a powerful tool for automating IT processes.
Why Ansible?
Ansible allows me to orchestrate the installation of k3s on all devices simultaneously without having to intervene manually. This ensures a consistent and error-free setup across all nodes.
I can also use Ansible to carry out updates, change the configuration, shut down or restart the cluster in an organised manner. The cluster can also be deleted and restarted. I have already needed the latter to activate IPv6. Unfortunately, this cannot be added retrospectively.
Automation steps
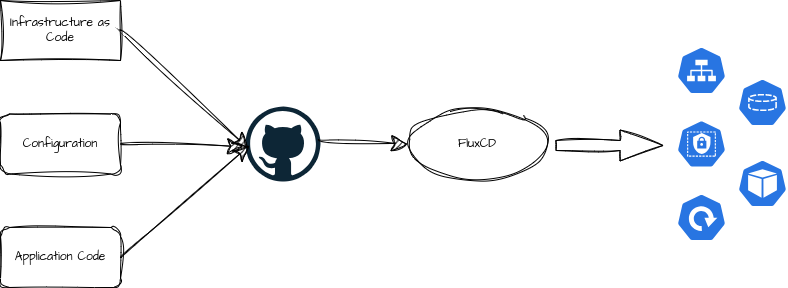
You can find the Ansible Playbook that I used on my GitHub. Here are the key points of the playbook:
- Preparation of the nodes: Ansible configures the necessary prerequisites on the nodes, such as installing dependencies and setting up the network configuration.
- Installation of k3s: The playbook runs the k3s installer on each node and configures the cluster parameters automatically.
- Post-installation tasks: After installation, the playbook ensures that all nodes are correctly connected and the cluster is operational.
To install the playbook with Ansible, you first need the inventory. This is where you define the host names of the servers involved.
---
k3s_cluster:
  children:
    server:
      hosts:
        master-server-name:
    agent:
      hosts:
        worker-node-1:
        worker-node-2:
Code language: YAML (yaml)
The configuration of the cluster is also inserted in the inventory:
  vars:
    ansible_port: <ssh-port>
    ansible_user: <username that is allowed to install things>
    k3s_version: <your desired k3s version>
    token: <a token you want to keep secret>
    api_endpoint: "{{ hostvars[groups['server'][0]]['ansible_host'] | default(groups['server'][0]) }}"
    extra_server_args: ""
    extra_agent_args: ""

  # Optional vars
    server_config_yaml:  |
      # e.g. to disable things
      disable:
        - traefik
        - servicelbCode language: PHP (php)
The playbook is executed with ansible-playbook playbook/site.yml -i inventory.yml. This installs k3s on the servers specified in the inventory with the correct roles. There are 3 more playbooks in this repository:
- upgrade.yaml: This can be used to update the k3s servers and restart them in the correct order. My setup does not need this, as I only run one server as the master.
- reboot.yaml: Restarts all servers in the correct order.
- reset.yaml: Removes k3s from all servers.
Conclusion and outlook
k3s has proven to be an excellent choice for my home Kubernetes cluster. It offers a balance between performance and simplicity that is perfect for my home network’s needs and resources. In the next post, I’ll dive deeper into the configuration of the cluster and share how I set up the individual services and applications.
Stay tuned, and let’s learn more about the exciting world of Kubernetes at home together!